- PHASE-1-sidecar.md
  - Note at top: streaming primitive decided as tmux control mode
  - Architecture sketch: tmux/pipe.ts → tmux/control.ts
  - T-1.1 description updated to reference control mode + spike-cc.ts
  - Risks R4 (parser throughput) and R5 (tmux ≥2.5 required) added

- SYNC.md
  - File ownership map: tmux/** note about control mode
  - Frozen Interface Contracts table: added Status + Frozen-at columns
    so contracts can be tracked from draft → frozen with date stamp
  - Freeze protocol prose

- NEW: NEXT-STEPS.md — single resume pointer for the next session.
  Lists what's done, what's draft, the orchestrator todo list (freeze
  contracts → dispatch T-1.0 → plan fan-out), open questions, and
  things explicitly NOT to do tomorrow.

- README.md: NEXT-STEPS.md added at top of the docs index.
|
||
|---|---|---|
| .husky | ||
| assets | ||
| docs | ||
| extensions/remote-control | ||
| .gitignore | ||
| LICENSE | ||
| Makefile | ||
| README.md | ||
| biome.json | ||
| package-lock.json | ||
| package.json | ||
README.md
pi-remote-control
Disclaimer
This project is for personal use and research only. It is provided as-is, and the author accepts no liability for any damage, loss, misuse, or operational consequences that result from installing or using it. The server has no built-in authentication beyond a session token and no HTTPS on the dynamic port — see Security notes for details. Do not use it for safety-critical, multi-user, or untrusted-network deployments.
Install
pi install https://github.com/goofansu/pi-remote-control
Usage
Run /remote-control to open the menu:
- Turn on / Turn off — start or stop the server
- Configure URL — set the base URL exposed by your local tunnel or proxy, saved to
~/.pi/agent/remote-control.json - Status — show the QR code and connection URL (only when server is running)
Note: On first use, you must configure the URL before the server can start.
To start the server automatically on launch:
pi --remote-control
Use case
The remote-control server binds to 127.0.0.1 on the host running pi and is reached through a local tunnel or proxy. This example uses Surge Ponte, which provides an end-to-end encrypted device-to-device tunnel without exposing the server to the LAN.
The setup is:
- Install this extension on the Mac that runs
pi. - Enable Surge Ponte on that Mac and give it a device name such as
pi. - On the same Mac, open
piand run the/remote-controlcommand. - Choose
Configure URLand set the base URL to your Surge Ponte hostname, for examplehttp://pi.sgponte. - Choose
Turn on. - Open
Statusto get the QR code and connection URL for the current session. - On another device on the same Surge Ponte network, open that URL in a browser.
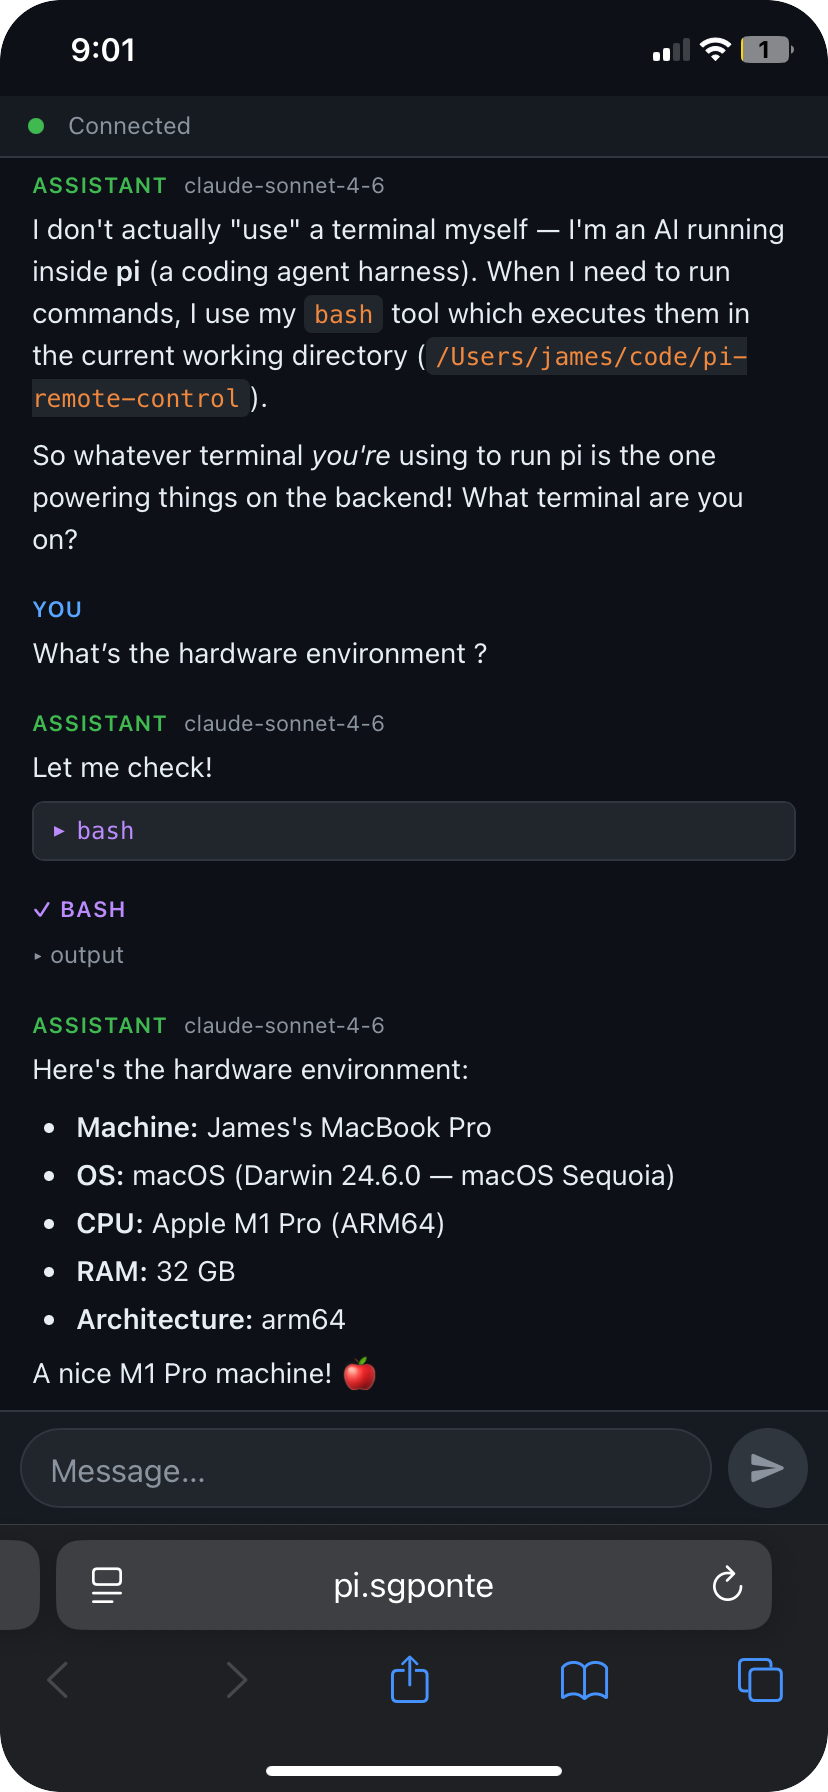
In this setup, the browser URL is http://pi.sgponte:<port>, where the port is assigned when the server starts. Use Status to get the current URL or scan the QR code — it changes each time the server restarts.
Here's what it looks like on iPhone — this is an actual session asking pi about its hardware environment:
Security notes
- The server only listens on localhost. Remote access depends on whatever local tunnel or proxy you configure.
- There is no multi-user authentication. Treat the connection URL as a secret for the lifetime of the session.
- If you use a reverse proxy instead of Surge Ponte, configure it to terminate TLS at a fixed
https://endpoint and forward to the server's dynamic backend port. Do not expose the dynamic port directly over a public network, as the server does not support HTTPS and any token or session cookie would be transmitted in cleartext.